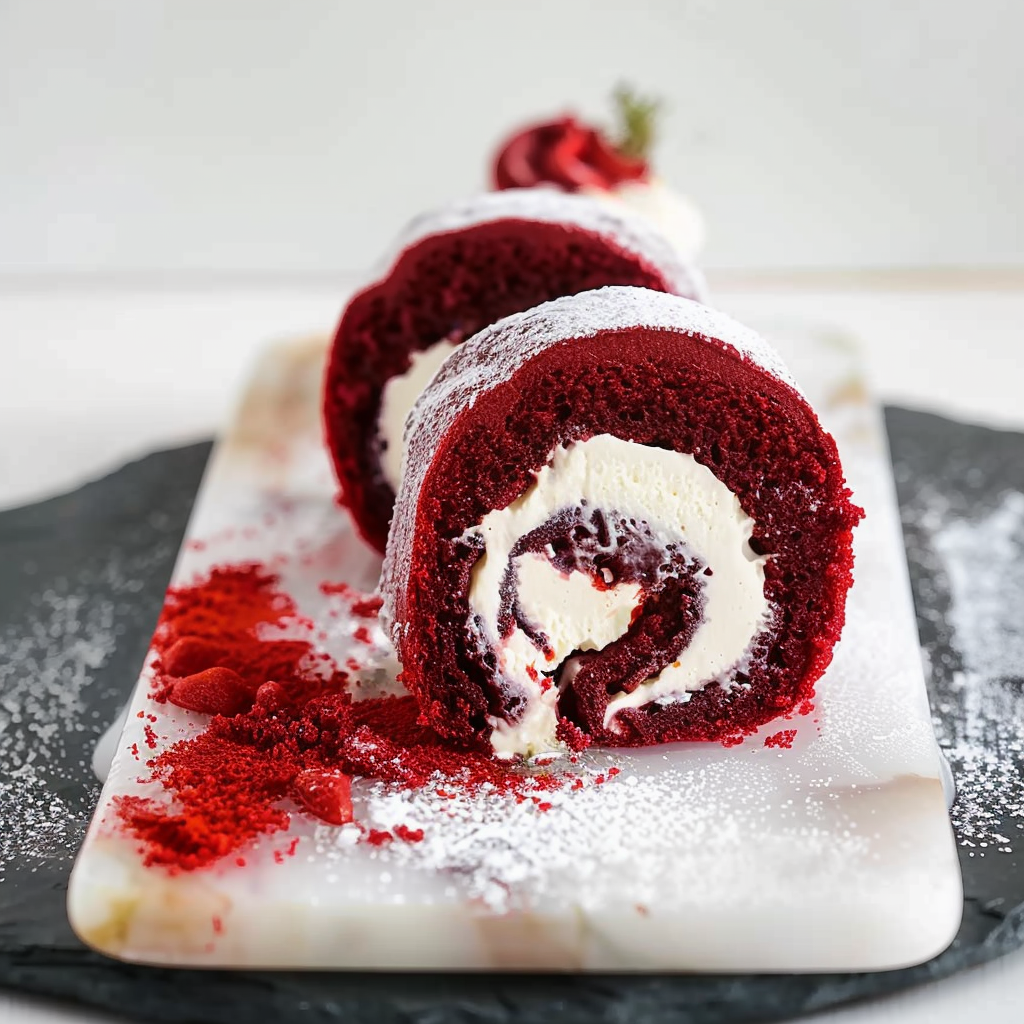
There’s something almost magical about a Red Velvet Roll. Imagine a dessert that combines the richness of chocolate with the vibrant allure of red, all wrapped up in a soft, pillowy embrace. The moment you slice into this beauty, your senses are treated to a delightful swirl of colors and flavors that promises to take your taste buds on a joyful ride.

I remember the first time I made this Red Velvet Roll for my family. They were skeptical at first, raising eyebrows at the bold color and unique presentation. But as soon as they took their first bite, the laughter and cheers erupted like it was New Year’s Eve! It was one of those moments where food not only satisfied hunger but also sparked joy and connection among loved ones.
Why You'll Love This Red Velvet Roll
- This incredible Red Velvet Roll transforms simple everyday ingredients into restaurant-quality flavors that will blow your mind completely.
- Foolproof recipe techniques guarantee perfect results every single time, making even novice cooks feel like professional chefs instantly.
- Stunning visual appeal with gorgeous colors and mouthwatering aromas creates the ultimate Instagram-worthy dish for any special occasion.
- Endlessly adaptable for different dietary needs while working beautifully for meal prep, date nights, or entertaining large groups effortlessly.
I’ll never forget my cousin’s face when she tried it; her eyes widened and a smile spread across her face like she just spotted a unicorn in our backyard.
Essential Ingredients
Here’s what you’ll need to make this delicious dish:
- All-Purpose Flour: A staple for creating that perfect soft texture; sift it for a lighter roll.
- Cocoa Powder: Use unsweetened cocoa powder for rich flavor without added sweetness.
- Granulated Sugar: Sweetness is key here; adjust according to your taste preference.
- Eggs: Fresh eggs help bind everything together and add moisture.
- Buttermilk: This adds tanginess and tenderness to the cake; don’t skip it!
- Vegetable Oil: For moisture without heaviness; can substitute with melted butter if desired.
- Red Food Coloring: The star ingredient that gives this cake its signature hue; use gel coloring for vibrant results.
- Baking Powder & Baking Soda: These are essential leaveners that ensure your roll rises beautifully.
- Cream Cheese Frosting: For the filling – because what’s a Red Velvet Roll without cream cheese frosting?
The full ingredients list, including measurements, is provided in the recipe card directly below.
How to Make Red Velvet Roll
Preheat oven to 350°F (175°C). Line a jelly roll pan with parchment paper and lightly grease it for easy removal later.
Mixing Dry Ingredients: In a bowl, whisk together flour, cocoa powder, baking powder, and baking soda until combined. This step prevents lumps from forming in your batter.
Creating the Batter: In another bowl, beat together eggs and sugar until fluffy. Mix in buttermilk, oil, red food coloring, and vanilla extract until well combined; then gently fold in the dry ingredients.
Baking Time: Pour the batter into your prepared pan and spread evenly. Bake in preheated oven for 15-20 minutes or until a toothpick inserted comes out clean.
Rolling Up: Once baked, carefully invert the cake onto a clean kitchen towel dusted with powdered sugar. Peel off parchment paper while it’s still warm. Roll up with the towel starting from one short end; let it cool completely.
Filling & Serving: Unroll gently, spread cream cheese frosting over the surface generously. Roll back up tightly without the towel this time, slice into pieces and serve immediately or chill before serving for extra firmness!
This delightful Red Velvet Roll is sure to become your new go-to dessert for celebrations or just because you deserve something scrumptious! Enjoy every sweet morsel as you share laughter around your table!
This showstopping Red Velvet Roll delivers restaurant-quality results using simple ingredients you probably already have at home. The perfect balance of textures and flavors creates an unforgettable dining experience that will have everyone asking for seconds. Picture-perfect presentation with vibrant colors makes this dish absolutely Instagram-worthy and guaranteed to impress any dinner guest. Incredibly versatile recipe that works beautifully for weeknight dinners, meal prep, special occasions, or even outdoor entertaining sessions.
Perfecting the Cooking Process
Start by preheating your oven to 350°F (175°C) while you mix your batter. This ensures it’s hot enough to give your Red Velvet Roll a beautiful rise. Prepare your baking pan with parchment paper, which prevents sticking and helps with easy removal later on. Once your batter is ready, pour it into the pan and smooth it out evenly before baking for about 15-20 minutes until a toothpick comes out clean.
Add Your Touch
Feel free to customize your Red Velvet Roll! Swap out buttermilk for yogurt or use almond milk for a dairy-free option. You can also add chocolate chips or nuts for extra texture. For those who love a little zing, a teaspoon of orange zest can elevate the flavor profile beautifully. Don’t be afraid to experiment; this roll is as forgiving as a good friend!
Storing & Reheating
To store your Red Velvet Roll, wrap it tightly in plastic wrap or aluminum foil and keep it in the fridge for up to three days. If you want to make it last longer, freeze it wrapped securely for up to two months. To reheat, simply let it thaw overnight in the fridge and warm it gently in the microwave or oven for a few minutes, ensuring it stays moist and delicious.
Chef's Helpful Tips for Red Velvet Roll
- The secret to achieving that perfect red hue lies in using quality cocoa powder alongside red food coloring—don’t skimp!
- Always sift your dry ingredients together first; this adds air and reduces lumps in your batter.
- When rolling the cake, use a kitchen towel dusted with powdered sugar—this prevents sticking and helps maintain shape during cooling.
- Lastly, let the roll cool completely before adding cream cheese frosting to avoid melting it away into a puddle of deliciousness!
Sharing my first attempt at making this Red Velvet Roll is like recounting my first awkward dance at prom—memorable yet slightly cringeworthy! Friends were gracious enough to compliment my “unique” take on dessert, but I knew they were just being polite as they politely asked if there was more cake.
FAQ
What makes Red Velvet Roll different from regular cake?
Red Velvet Roll stands out because of its signature red color and subtle chocolate flavor from cocoa powder. It has a unique blend of creamy frosting that balances perfectly with its soft texture, making it visually striking and deliciously tempting.
Can I use any type of food coloring for my Red Velvet Roll?
While you can technically use any food coloring, traditional recipes call for red food coloring to achieve that iconic hue. Gel food coloring often works best since it provides vibrant color without altering the batter’s consistency.
How do I prevent my Red Velvet Roll from cracking?
To minimize cracks while rolling your cake, ensure it’s fully cooled before attempting to roll it up with filling inside. Also, using a gentle touch when rolling helps maintain its structure—no wrestling matches allowed!
Can I make this recipe gluten-free?
Absolutely! Substitute regular flour with a gluten-free all-purpose blend that contains xanthan gum for binding. Just ensure all other ingredients are gluten-free too; you’ll enjoy a delightful dessert without compromising texture or taste.
Conclusion for Red Velvet Roll
In summary, mastering the art of making a Red Velvet Roll involves understanding the cooking process and customizing flavors according to your taste preferences. With proper storage techniques, you can enjoy this delightful treat long after it’s made. So gather your ingredients and get rolling—your taste buds will thank you!
Red Velvet Roll
Red Velvet Roll is a show-stopping dessert that marries the rich flavor of chocolate with a stunning red hue, all wrapped in a soft, pillowy cake. This delightful treat is perfect for any occasion, offering a creamy cream cheese filling that adds to its allure. Whether you’re celebrating a special event or simply indulging yourself, this Red Velvet Roll will impress and satisfy.
- Prep Time: 20 minutes
- Cook Time: 20 minutes
- Total Time: 40 minutes
- Yield: Serves approximately 10 slices 1x
- Category: Dessert
- Method: Baking
- Cuisine: American
Ingredients
- 1 cup all-purpose flour
- 1/4 cup unsweetened cocoa powder
- 1 cup granulated sugar
- 3 large eggs
- 1/2 cup buttermilk
- 1/2 cup vegetable oil
- 1 tbsp red food coloring (gel)
- 1 tsp baking powder
- 1 tsp baking soda
- 1 cup cream cheese frosting (for filling)
Instructions
- Preheat oven to 350°F (175°C). Line a jelly roll pan with parchment paper and grease lightly.
- In a bowl, whisk together flour, cocoa powder, baking powder, and baking soda.
- In another bowl, beat eggs and sugar until fluffy. Mix in buttermilk, oil, red food coloring, and vanilla extract. Fold in dry ingredients.
- Pour batter into the prepared pan and bake for 15-20 minutes or until a toothpick comes out clean.
- Invert the cake onto a powdered sugar-dusted kitchen towel and roll it up while warm; let cool completely.
- Unroll the cake, spread cream cheese frosting generously over the surface, then re-roll tightly without the towel.
- Slice into pieces to serve.
Nutrition
- Serving Size: 1 slice (70g)
- Calories: 270
- Sugar: 22g
- Sodium: 180mg
- Fat: 14g
- Saturated Fat: 2g
- Unsaturated Fat: 11g
- Trans Fat: 0g
- Carbohydrates: 33g
- Fiber: 1g
- Protein: 4g
- Cholesterol: 40mg
Keywords: Substitute buttermilk with yogurt or almond milk for dietary variations. Add chocolate chips or nuts for extra texture and flavor. To maintain moisture when storing leftovers, wrap tightly in plastic wrap.


