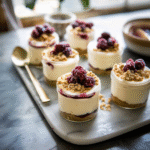
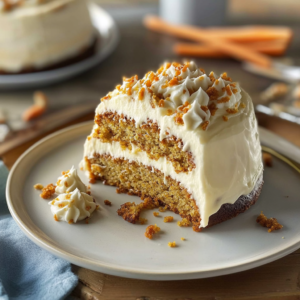
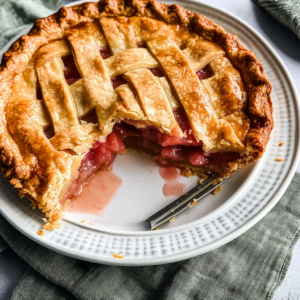
Mini cheesecakes in adorable little jars? Yes, please! Picture a velvety, creamy cheesecake nestled in a charming jar, topped with your favorite fruit or a luscious chocolate drizzle. The moment you pop the lid, an irresistible wave of sweet and tangy aromas envelopes you, coaxing your taste buds into a delighted dance. Whether you’re prepping for a cozy night in or hosting a festive gathering, these mini cheesecake jars promise to elevate any occasion—because who can resist cheesecake that fits in your hand?
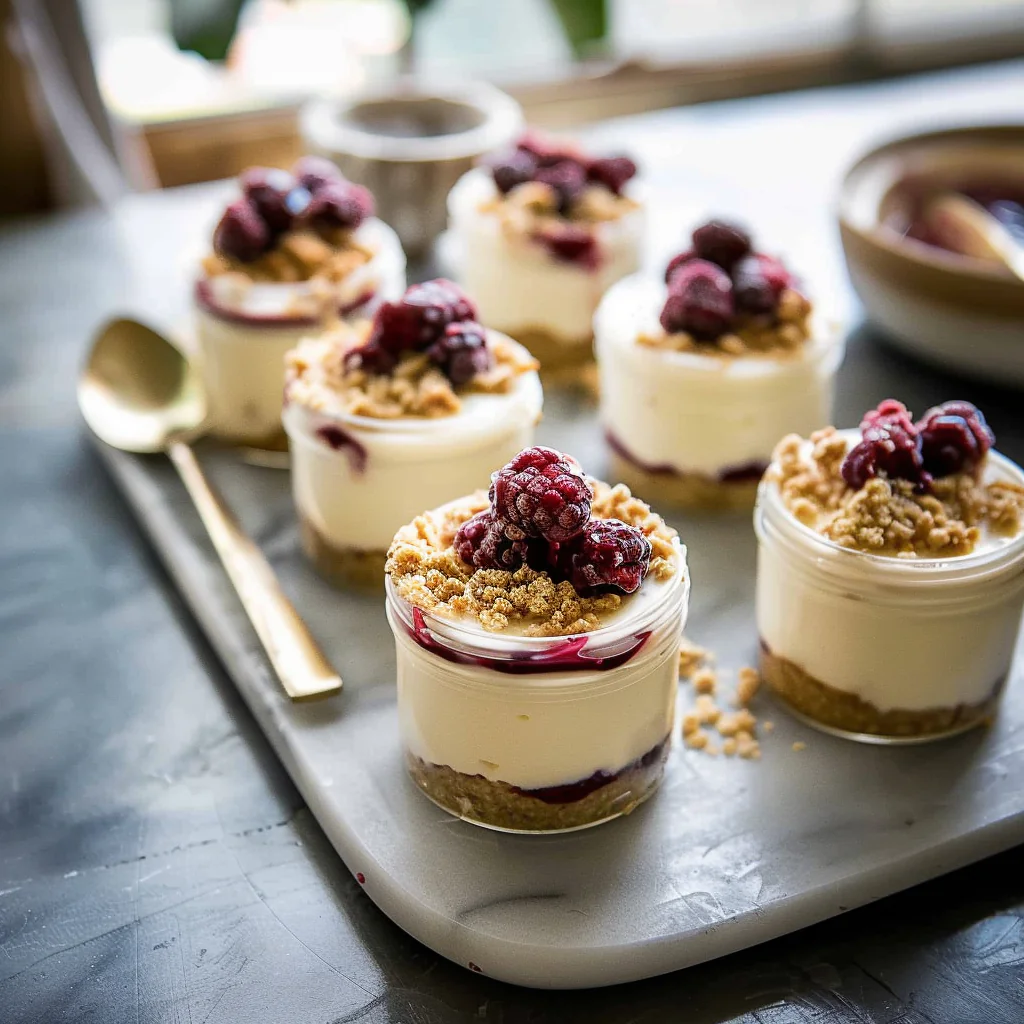
I still remember the first time I surprised my friends with these delightful treats. Their eyes lit up like fireworks as they dug into the jars, and amidst laughter and cheerful banter, I realized I had stumbled upon a dessert that was destined to become a family favorite. Ideal for birthdays, picnics, or just because you deserve something sweet today, these mini cheesecakes deliver amazing flavor in every single bite.
Why You'll Love This Mini Cheesecake Jars
- This incredible Mini Cheesecake Jars transforms simple everyday ingredients into restaurant-quality flavors that will blow your mind completely.
- Foolproof recipe techniques guarantee perfect results every single time, making even novice cooks feel like professional chefs instantly.
- Stunning visual appeal with gorgeous colors and mouthwatering aromas creates the ultimate Instagram-worthy dish for any special occasion.
- Endlessly adaptable for different dietary needs while working beautifully for meal prep, date nights, or entertaining large groups effortlessly.
Every time my friends take a bite of these mini cheesecake jars, their faces light up with joy—a true testament to how delicious they are.
Essential Ingredients
Here’s what you’ll need to make this delicious dish:
- Cream Cheese: Use softened cream cheese for easy blending; it makes the filling super silky.
- Sugar: Granulated sugar is best here; it balances the tanginess of cream cheese perfectly.
- Sour Cream: A dollop adds creaminess and depth; full-fat sour cream works wonders.
- Vanilla Extract: Pure vanilla extract enhances flavor; skip imitation stuff if you can—it’s worth it!
- Graham Crackers: Crush them up for that classic crust; feel free to use gluten-free options if needed.
- Butter: Melted butter binds the crust together; unsalted is recommended to control saltiness.
- Your Favorite Toppings: Think fresh berries or chocolate sauce for decadence; let your imagination run wild!
The full ingredients list, including measurements, is provided in the recipe card directly below.

How to Make Mini Cheesecake Jars
Create the Crust: Start by crushing graham crackers until fine crumbs form—aim for a sandy texture. Combine crumbs with melted butter until it resembles wet sand. Spoon this mixture evenly into each jar and press gently to form a solid base.
Prepare the Cheesecake Filling: In a mixing bowl, combine softened cream cheese and sugar using an electric mixer on medium speed until smooth and fluffy—about 2-3 minutes should do it. Add sour cream and vanilla extract, mixing until fully incorporated.
Fill the Jars: Carefully spoon the creamy cheesecake filling over each crust layer in your jars. Leave some space at the top for toppings; trust me—it’s worth it! Use an offset spatula to smooth out the tops for that picture-perfect finish.
Chill and Set: Cover each jar with plastic wrap and refrigerate for at least 4 hours—or overnight if you can resist! This allows the flavors to meld beautifully while achieving that perfect cheesecake texture.
Add Your Toppings: Before serving, unleash your creativity with toppings! Whether it’s drizzling chocolate sauce or adding fresh berries on top—this is where you can truly personalize your mini cheesecake jars.
Serve and Enjoy: Grab spoons and dig into those jars of happiness! Watch as everyone marvels at both the taste and presentation of these adorable desserts—it’s pure joy in every bite!
Now you’re ready to whip up some delightful mini cheesecake jars that will have everyone asking for seconds (and maybe thirds). Happy baking!
Key Tips for Mini Cheesecake Jars: Mini cheesecake jars are an indulgent treat that can be easily perfected.
Keep it Cool: Let your cream cheese soften to room temperature for a silky texture. This helps avoid lumps.
Don’t Rush the Crust: Make sure to press your crust firmly for that perfect crunch in every bite. Trust me, nobody likes a mushy crust!
Layer with Love: Alternate layers of cheesecake and toppings for visual appeal and flavor balance. It’s like a party in a jar!
You Must Know About Mini Cheesecake Jars
- This showstopping Mini Cheesecake Jars delivers restaurant-quality results using simple ingredients you probably already have at home.
- The perfect balance of textures and flavors creates an unforgettable dining experience that will have everyone asking for seconds.
- Picture-perfect presentation with vibrant colors makes this dish absolutely Instagram-worthy and guaranteed to impress any dinner guest.
- Incredibly versatile recipe that works beautifully for weeknight dinners, meal prep, special occasions, or even outdoor entertaining sessions.
Perfecting the Cooking Process
To create the ultimate mini cheesecake jars, start by preparing your crust first. While it sets in the fridge, whip up your creamy cheesecake filling. Once both components are ready, layer them together in jars for best results.
Add Your Touch
Feel free to customize these jars! Swap out traditional graham crackers for crushed Oreos or add flavored extracts like vanilla or almond to the cheesecake mixture for a twist.
Storing & Reheating
Store your mini cheesecake jars in the refrigerator for up to five days. For best quality, avoid freezing as it can alter the texture. Just grab one when you’re ready to indulge!
Chef's Helpful Tips for Mini Cheesecake Jars
- This professional-quality Mini Cheesecake Jars relies on precise timing and temperature control to achieve restaurant-standard results consistently.
- Master the art of mise en place by prepping all ingredients beforehand, ensuring smooth execution and preventing any last-minute cooking disasters.
- The secret lies in layering flavors throughout the cooking process rather than seasoning only at the end for maximum depth.
- Tip let the finished dish rest for optimal texture and flavor development before serving to hungry guests waiting eagerly.
I remember the first time I made mini cheesecake jars; my friends devoured them faster than I could say “cheesecake.” Their compliments fueled my passion for creating desserts that bring people together!
FAQ
What is the best way to serve mini cheesecake jars?
Serving mini cheesecake jars is as easy as popping off their lids! You can garnish them with whipped cream, fresh berries, or even chocolate shavings right before serving. This adds a touch of elegance while keeping it simple.
Can I make mini cheesecake jars ahead of time?
Absolutely! These delightful treats can be made up to two days in advance and stored in the refrigerator until you’re ready to serve them at your gathering or event.
How do I prevent my cheesecake from cracking?
To avoid cracks in your cheesecakes, ensure you don’t overmix your batter and bake them at a low temperature in a water bath if possible. A gentle approach goes a long way!
Can I use non-dairy alternatives?
Yes! You can substitute cream cheese with non-dairy cream cheese or cashew-based options for a delicious dairy-free version of these mini cheesecakes without sacrificing flavor.
Conclusion for Mini Cheesecake Jars
Mini cheesecake jars are not only delicious but also incredibly versatile and easy to prepare! With tips on perfecting your crust and customizing flavors, you’re set for dessert success. Remember to store them properly so they remain fresh and delightful. Whether it’s a casual dinner or special occasion, these jars will surely impress everyone around you!
Mini Cheesecake Jars
Mini cheesecake jars are an adorable and indulgent dessert perfect for any occasion. These creamy, velvety treats are nestled in charming jars, making them not only delicious but also visually stunning. Topped with your choice of fresh fruits or decadent sauces, they bring joy to every gathering. Whether it’s a birthday celebration, a cozy night in, or simply a treat for yourself, these mini cheesecakes are sure to impress.
- Prep Time: 20 minutes
- Cook Time: N/A
- Total Time: 25 minute
- Yield: Serves 4
- Category: Dessert
- Method: Chilling
- Cuisine: American
Ingredients
- 8 oz cream cheese (softened)
- 1/2 cup granulated sugar
- 1/2 cup sour cream (full-fat)
- 1 tsp pure vanilla extract
- 1 cup graham cracker crumbs
- 4 tbsp unsalted butter (melted)
- Your favorite toppings (fresh berries or chocolate sauce)
Instructions
- Prepare the crust by crushing graham crackers into fine crumbs. Mix with melted butter until it resembles wet sand. Press into the bottom of jars.
- In a bowl, beat softened cream cheese and sugar until smooth. Add sour cream and vanilla extract; mix until well combined.
- Spoon cheesecake filling over the crust in each jar, leaving space for toppings.
- Cover jars and chill in the refrigerator for at least 4 hours or overnight.
- Before serving, add your desired toppings and enjoy!
Nutrition
- Serving Size: 1 serving
- Calories: 320
- Sugar: 20g
- Sodium: 180mg
- Fat: 22g
- Saturated Fat: 12g
- Unsaturated Fat: 9g
- Trans Fat: 0g
- Carbohydrates: 28g
- Fiber: 1g
- Protein: 5g
- Cholesterol: 65mg
Keywords: For a gluten-free option, use gluten-free graham crackers. Customize flavors by adding different extracts or flavored toppings to cater to your taste preferences.

