There’s something magical about biting into a Caramelita. Picture this: a soft, chewy base that melts in your mouth while sweet caramel oozes out like a hidden treasure. The delightful combination of buttery flavors and chocolate chunks creates a sensory experience that’s hard to resist. Just the thought of it makes my taste buds dance with joy!

I remember the first time I made these sweet gems for a family gathering. Everyone was raving about them, and to this day, they still ask for more. Whether it’s a cozy night in or a festive celebration, Caramelitas always steal the show and leave everyone wanting seconds!
Why You'll Love This Caramelitas
- These incredible Caramelitas transform simple everyday ingredients into restaurant-quality flavors that will blow your mind completely.
- Foolproof recipe techniques guarantee perfect results every single time, making even novice cooks feel like professional chefs instantly.
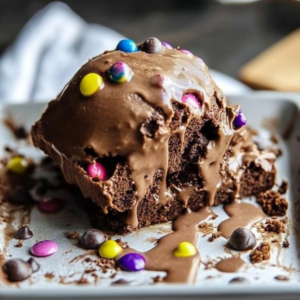
- Stunning visual appeal with gorgeous colors and mouthwatering aromas creates the ultimate Instagram-worthy dish for any special occasion.
- Endlessly adaptable for different dietary needs while working beautifully for meal prep, date nights, or entertaining large groups effortlessly.
I will never forget the time I brought these Caramelitas to a potluck; people were practically fighting over the last piece, declaring me the “Caramelita Queen” of the event!
Essential Ingredients
Here’s what you’ll need to make this delicious dish:
- Unsalted Butter: Choose high-quality butter for rich flavor; it makes all the difference in baking.
- Brown Sugar: Dark brown sugar adds depth and moisture, giving your Caramelitas that gooey texture we all love.
- Granulated Sugar: Just a touch balances out the flavors; don’t skip it!
- All-Purpose Flour: Standard flour works wonders here; make sure it’s fresh for optimal results.
- Baking Soda: This essential leavening agent ensures your Caramelitas rise perfectly without becoming too dense.
- Salt: A pinch of salt enhances sweetness and balances flavors beautifully.
- Chocolate Chips: Semi-sweet or dark chocolate chips lend that irresistible chocolaty goodness; mix it up with white chocolate if you dare!
- Creamy Caramel Sauce: Use store-bought or homemade caramel sauce for that dreamy filling; it’s worth the indulgence!
The full ingredients list, including measurements, is provided in the recipe card directly below.

How to Make Caramelitas
Getting started on these Caramelitas is as easy as pie—well, easier actually! Let’s dive into this delicious journey.
Preheat Your Oven: Start by preheating your oven to 350°F (175°C). This ensures an even bake for those heavenly treats.
Prepare Your Baking Dish: Grease a 9×13-inch baking dish with nonstick spray or line it with parchment paper. This prevents sticking and makes cleanup a breeze.
Create Your Dough Base: In a large bowl, cream together melted butter, brown sugar, granulated sugar, and vanilla until smooth. It should smell heavenly at this point!
Add Dry Ingredients: Gently mix in flour, baking soda, and salt until just combined. Avoid over-mixing as we want our dough tender and melt-in-your-mouth delicious.
Layer It Up!: Press half of your dough mixture into the prepared baking dish evenly. Pour half of your creamy caramel sauce over this layer followed by chocolate chips.
Add The Topping Layer: Crumble the remaining dough over the top to create an inviting crust. Drizzle with more caramel sauce because why not indulge?
Bake Until Golden Brown: Place in the preheated oven for 25-30 minutes or until golden brown around the edges—your kitchen will smell divine during this time!
These steps are simple yet effective, ensuring you create the most delightful Caramelitas that will wow your family or guests!
Enjoy every moment of making these treats—it’s not just about eating them; it’s about creating memories in your kitchen!
You Must Know About Caramelitas
- This showstopping Caramelitas delivers restaurant-quality results using simple ingredients you probably already have at home.
- The perfect balance of textures and flavors creates an unforgettable dining experience that will have everyone asking for seconds.
- Picture-perfect presentation with vibrant colors makes this dish absolutely Instagram-worthy and guaranteed to impress any dinner guest.
- Incredibly versatile recipe that works beautifully for weeknight dinners, meal prep, special occasions, or even outdoor entertaining sessions.
Perfecting the Cooking Process
To make the most of your Caramelitas, start by prepping all your ingredients first. This ensures a smooth workflow and prevents last-minute chaos. Begin with melting butter and sugar together until they bubble away like a happy cauldron. Then, layer your ingredients systematically—first the cookie base, followed by gooey caramel, and finally the crumbly topping. This method guarantees even cooking and prevents any soggy surprises.
Add Your Touch
Feel free to unleash your inner culinary artist with this recipe! Swap out the chocolate chips for butterscotch or peanut butter chips for a fun twist. If you’re feeling adventurous, toss in some crushed nuts or sprinkle sea salt on top right before serving for that gourmet touch. Remember, this dish is about making it yours—so don’t hold back!
Storing & Reheating
To keep your Caramelitas fresh, store them in an airtight container at room temperature for up to a week. If you want to extend their shelf life, refrigerate them; just be sure to let them come back to room temperature before indulging again. Reheat in the microwave for about 10-15 seconds to bring back that gooey goodness without losing texture.
Chef's Helpful Tips for Caramelitas
- This professional-quality Caramelitas relies on precise timing and temperature control to achieve restaurant-standard results consistently.
- Master the art of mise en place by prepping all ingredients beforehand, ensuring smooth execution and preventing any last-minute cooking disasters.
- The secret lies in layering flavors throughout the cooking process rather than seasoning only at the end for maximum depth.
- Tip let the finished dish rest for optimal texture and flavor development before serving to hungry guests waiting eagerly.
Sometimes I find myself staring at a plate of my homemade Caramelitas while friends rave about how amazing they taste—it’s moments like these that remind me why I love cooking! I remember one gathering where they disappeared faster than I could serve them; it was a sweet victory that made my heart swell with joy.
FAQ
What are Caramelitas?
Caramelitas are decadent dessert bars featuring layers of buttery cookie crust, rich caramel sauce, and chocolate chips. They provide a delightful balance of chewy and crunchy textures that will leave you craving more after just one bite.
Can I make Caramelitas ahead of time?
Absolutely! You can prepare these delicious treats a day or two in advance. Just make sure to store them properly in an airtight container so they remain fresh and tasty when it’s time to enjoy.
How do I prevent my caramel from burning?
To avoid burnt caramel, keep a close eye on it while it cooks over medium heat. Stir it consistently until it reaches a golden color; patience is key! If you’re unsure, using a candy thermometer can help achieve the perfect temperature.
Can I use different types of chocolate in my Caramelitas?
You bet! Feel free to experiment with milk chocolate, dark chocolate, or even white chocolate chips based on your preference. Each variation brings its unique twist on flavor that can elevate your Caramelitas experience even further.
Conclusion for Caramelitas
Caramelitas are not just another dessert; they’re an experience waiting to happen! By following these tips on preparation, storage, and customization, you’ll create an irresistible treat that leaves everyone wanting more. So gather your ingredients and get ready for some serious baking fun—you won’t regret it!
Caramelitas
Caramelitas are the ultimate indulgence, combining a buttery cookie crust with a luscious caramel filling and rich chocolate chips. This irresistible treat is easy to make and perfect for any occasion, from casual family gatherings to festive celebrations. Each bite offers a delightful balance of chewy and crunchy textures that will leave everyone asking for seconds. Get ready to impress your guests with this simple yet delectable dessert!
- Prep Time: 15 minutes
- Cook Time: 30 minutes
- Total Time: 45 minutes
- Yield: About 18 servings 1x
- Category: Dessert
- Method: Baking
- Cuisine: American
Ingredients
- 1 cup unsalted butter, melted
- 1 cup brown sugar, packed
- 1/2 cup granulated sugar
- 2 cups all-purpose flour
- 1 tsp baking soda
- 1/2 tsp salt
- 1 cup semi-sweet chocolate chips
- 1 cup creamy caramel sauce
Instructions
- Preheat the oven to 350°F (175°C). Grease a 9×13-inch baking dish or line it with parchment paper.
- In a large bowl, mix melted butter, brown sugar, granulated sugar, and vanilla until smooth.
- Add flour, baking soda, and salt; stir until just combined.
- Press half of the dough into the bottom of the prepared dish. Pour half of the caramel sauce over the dough and sprinkle with chocolate chips.
- Crumble the remaining dough over the top and drizzle with more caramel sauce.
- Bake for 25-30 minutes or until golden brown around the edges. Let cool before slicing.
Nutrition
- Serving Size: 1 bar (50g)
- Calories: 210
- Sugar: 15g
- Sodium: 120mg
- Fat: 10g
- Saturated Fat: 6g
- Unsaturated Fat: 4g
- Trans Fat: 0g
- Carbohydrates: 29g
- Fiber: 1g
- Protein: 2g
- Cholesterol: 25mg
Keywords: For variety, substitute chocolate chips with butterscotch or peanut butter chips. Enhance flavor by sprinkling sea salt on top before serving.